Monday, July 27, 2020

Forever Fern

Forever Fern Wall

All images © Stampin’ Up!®

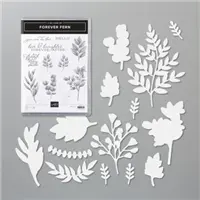
  • STAMPS – Forever Fern Cling Stamp Set (English) [152559]
  •  PAPER – Whisper White 8-1/2" X 11" Cardstock [100730], Pretty Peacock 8-1/2" X 11" Cardstock [150880]
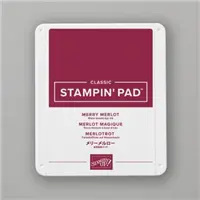
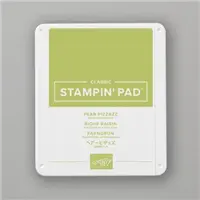
  • INK – Merry Merlot Classic Stampin' Pad [147112], Pear Pizzazz Classic Stampin' Pad [147104], Garden Green Classic Stampin' Pad [147089]
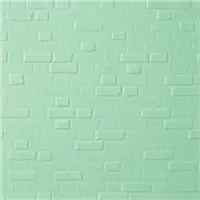
  • OTHER –Multipurpose Liquid Glue (110755), Bone Folder [102300], Paper Trimmer [152392], Brick & Mortar 3D Embossing Folder [149643], Paper Trimmer [152392], Stamparatus [146276], Post-It notes for masking


Cutting & Scoring:

  • Whisper White- 8 ½” x 5 ½”, score and fold at 4 ¼”
  • Pretty Peacock– 4 1/8” x 5 3/8”
  • Whisper White (image piece) – 4” x 5 ¼”


Instructions:

  • Stamp the berries on the image piece using the Merry Merlot. Stamp them 3 more times on Post-It notes and cut them out to use as mask
  • Once the berries are “masked” stamp the different leaves around them using the Pear Pizzazz, Garden Green and Pretty Peacock. Remove masks
  • Stamp the greeting using the Pretty Peacock. Stamp the splatter stamp in the different colors randomly on and around the image.
  • Emboss the image piece with the Brick & Mortar embossing folder.
  • Attach to the Pretty Peacock mat and both to the card base.
  • Stamp a couple of leaves in the inside corners along with desired greeting.

ONLY 3 DAYS LEFT!  July is Bonus Days.  For every $50 you purchase, you will receive a $5 coupon for use beginning August 4.  That is perfect timing to redeem for those beautiful items in the Holiday Catalog.  

July Host Code: SWZSM62J

NOTE:   The online store will be updated to a new look and layout beginning August 4!  
Please make sure you are shopping with me and please do let me know if you have any questions or difficulties.  I am happy to help as needed. 
Products Used
-------------------------------------------------------------------------------------------------------------

Sunday, July 26, 2020

Tasteful Touches

Tasteful Touches
All images © Stampin’ Up!®


Stampin' Up! Supplies
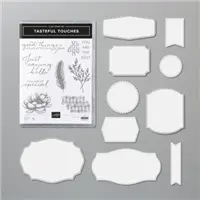
  • STAMPS – Tasteful Touches Bundle (English) - 154098
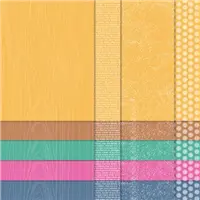
  • PAPER - 2020–2022 In Color 6" X 6" (15.2 X 15.2 Cm) Designer Series Paper – 153070, Misty Moonlight 8-1/2" X 11" Cardstock – 153081, Just Jade 8-1/2" X 11" Cardstock – 153079, Smoky Slate 8-1/2" X 11" Cardstock – 131202, Whisper White 8-1/2" X 11" Cardstock – 100730
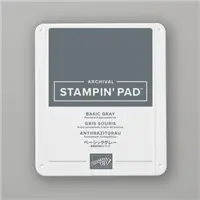
  • INK – Basic Gray Classic Stampin' Pad - 149165
  • OTHER- Tasteful Textile 3D Embossing Folder – 152718, Paper Trimmer – 152392, Paper Snips – 103579, Multipurpose Liquid Glue - 110755


Cutting & Scoring:  

  • Terracotta Tile – 8 ½” x 5 ½” score at 4 ¼” for landscape card
  • Smoky Slate(2)  – 5 ¼” x 4”
  • 2020–2022 In Color 6" X 6" (15.2 X 15.2 Cm) DSP (3) – ½” x 5 ¼”
  • 2020–2022 In Color 6" X 6" (15.2 X 15.2 Cm) DSP (2) – ½” x 4”
  • Whisper White scrap for diecut – 4” x 2 ½”
  • Just Jade scrap – 2 ½” x 1”
  • Whisper White  inside panel – 5 ¼” x 4”


Instructions:

  • Use Tasteful Textile 3D embossing folder to emboss one (1) piece of the Smoky Slate
  • Apply glue to left and right ends of 3 longer strips of DSP and line up horizontally on top of embossed panel.  Be sure to leave a gap on left side to weave in the other 2 shorter  pieces of DSP vertically
  • Weave in the ½” x 4” pieces of DSP toward left side of panel and glue each end.
  • Die cut Whisper White for greeting; Stamp greeting with Basic Gray
  • Die cut Just Jade and adhere to back on right side of Whisper White diecut
  • Adhere greeting to Smoky Slate panel; Adhere Smoky Slate panel to Misty Moonlight card front
  • Adhere 2nd Smoky Slate panel to inside of card for mat
  • Stamp decoration on inside Whisper White panel with Basic Gray nd adhere to inside of card
4 DAYS LEFT!  July is Bonus Days.  For every $50 you purchase, you will receive a $5 coupon for use beginning August 4.  That is perfect timing to redeem for those beautiful items in the Holiday Catalog.  

July Host Code: SWZSM62J

NOTE:   The online store will be updated to a new look and layout beginning August 4!  
Please make sure you are shopping with me and please do let me know if you have any questions or difficulties.  I am happy to help as needed. 

Products Used:
--------------------------------------------------------------------------------------------------------

Saturday, July 25, 2020

In Good Taste

In Good Taste

All images © Stampin’ Up!®


Stampin’ Up! Supplies:

  • STAMPS – Tasteful Touches (152562)
  • PAPER – Rococo Rose Grape Cardstock (150882), Whisper White Cardstock (100730)
  • INK – Early Espresso Ink Pad (147114), Rococo Rose Ink Pad (150080), Pool Party Ink Pad (147107)
  • OTHER- Layering Circle Dies (151770), Early Espresso ¼” Faux Suede Trim (152472), Stamping Sponges (141337), Stampin’ Dimensionals (104430), Multipurpose liquid glue (110755)


Cutting & Scoring:  

·         Rococo Rose – 11” x 4 ¼”, score and fold at 5 ½”.

·         Whisper White – (2) 5 ¼” x 4”.


Instructions:

  • Use Early Espresso ink to stamp the sentiment at the bottom of a Whisper White panel.

  • Die-cut the largest circle, from the Layering Circles Dies, approximately ½” from the top of the same Whisper White panel.
  • Using a sticky note for a mask, center the straight line in the center of the die-cut circle. Use the smallest Layering Circles die to cut a mask for the moon. Apply to the left side of the circle with a portion over the original mask.
  • Sponge Rococo Rose ink over and around the small circle mask and across the circle.  Add some Pool Party sponging at the top for the rest of the sky
  • Remove both masks and reposition the straight line to cover your horizon line, then sponge the water onto the circle with Pool Party ink.
  • Place the circle into the hole in the original panel. Stamp the leaf sprigs twice with Early Espresso ink with some leaves extending over the moon.
  • Add a ribbon with a knot between the sentiment and the focal point hole. Adhere the panel with the hole onto the card base, then adhere the sponged circle in place with dimensionals
  • Add a panel of Whisper White to the inside and add a sentiment of choice.
REMEMBER!  July is Bonus Days.  For every $50 you purchase, you will receive a $5 coupon for use beginning August 4.  That is perfect timing to redeem for those beautiful items in the Holiday Catalog.  

July Host Code: SWZSM62J

NOTE:   The online store will be updated to a new look and layout beginning August 4!  
Please make sure you are shopping with me and please do let me know if you have any questions or difficulties.  I am happy to help as needed. 

Friday, July 24, 2020

Field Of Flowers


Field of Flowers


All images © Stampin’ Up!®


Stampin’ Up! Supplies:

·    STAMPS – Field Of Flowers Photopolymer Stamp Set - 152589

·    PAPER - Flowers For Every Season 6" X 6" (15.2 X 15.2 Cm) Designer Series Paper – 152486,  Misty Moonlight 8-1/2" X 11" Cardstock – 153081, Bumblebee 8-1/2X11 Cardstock – 153077,  Just Jade 8-1/2" X 11" Cardstock – 153079,  Whisper White 8-1/2" X 11" Cardstock - 100730

·    INK – Just Jade Classic Stampin' Pad – 153115,  Bumblebee Classic Stampin' Pad – 153116, Magenta Madness Classic Stampin' Pad - 153117

·    OTHER- Many Medallions Dies – 153584, Flowers For Every Season Ribbon Combo Pack – 153620, Paper Trimmer – 152392, Paper Snips – 103579, Fine-Tip Glue Pen – 138309, Mini Glue Dots – 103683, Multipurpose Liquid Glue - 110755


Cutting & Scoring:  

·         Misty Moonlight - 8 ½” x 5 ½” score at 4 ¼”

·         Flowers for Every Season DSP - 5 ¼” x 4"

·         Misty Moonlight - 3 7/8  x 2 1/8

·         Whisper White - 3 ¾" x 2"

·         Bumblebee - 6" x 1"

·         Just Jade - 6" x ½” for die cut and 5 ¼” x 4" for inside mat

·         Whisper White - 5" x ¾”      


Instructions:

·    Adhere DSP to card front

·    Die cut diamond strip from Just Jade

·    Die cut squares strip from Bumblebee

·    Adhere squares strip on left side of portrait card with Fine-tip Glue Pen

·    Adhere diamond strip over squares strip with Fine-tip Glue Pen trimming excess as needed

·    Stamp flower stem and grass onto Whisper White rectangle with Just Jade

·    Stamp flowers with Magenta Madness

·    Stamp grass with Bumblebee over Just Jade grass

·    Stamp dragonfly randomly as desired using Bumblebee

·    Adhere stamped rectangle to Misty Moonlight mat and card front with Multipurpose Liquid Glue

·    Tie triple loop bow and add to card front with mini glue dot

·    Stamp sentiment and grass on inside Whisper White panel

·    Adhere to Just Jade mat and inside of card


REMEMBER!  July is Bonus Days.  For every $50 you purchase, you will receive a $5 coupon for use beginning August 4.  That is perfect timing to redeem for those beautiful items in the Holiday Catalog.  

July Host Code: SWZSM62J

NOTE:   The online store will be updated to a new look and layout beginning August 4!  
Please make sure you are shopping with me and please do let me know if you have any questions or difficulties.  I am happy to help as needed. 

Intricate Die Cutting

Ornate Layers Intricate Die Cutting Trick
July 24, 2020

Never fear those intricate dies!  I know they can seem tedious to cut, but with the right technique and tools, it's much easier and definitely worth the bit of effort to get such a beautiful addition to your project.  Take a look at the video and please let me know if you are having problems.  Our projects are supposed to be fun, not an exercise in frustration!


REMEMBER!  July is Bonus Days.  For every $50 you purchase, you will receive a $5 coupon for use beginning August 4.  That is perfect timing to redeem for those beautiful items in the Holiday Catalog.  

July Host Code: SWZSM62J

NOTE:   The online store will be updated to a new look and layout beginning August 4!  
Please make sure you are shopping with me and please do let me know if you have any questions or difficulties.  I am happy to help as needed.